
Over the past decade, building AI models has become increasingly accessible thanks to frameworks like scikit-learn, PyTorch, and TensorFlow. While these tools greatly help accelerate AI development, using them still necessitates a basic understanding of the mathematics involved and programming in general. Collecting and organizing samples and metadata adds another layer of complexity, which can further discourage beginners before they even start. Therefore, I’m always on the hunt for accessible alternatives that help reduce the time from an idea to a first prototype, especially when I just want to toy around with data. Read on to learn how Edge Impulse fits into the equation and how the cloud platform allows even total beginners to build their first functioning models in a few minutes without writing any code!
This is a two-part series. You’re reading part one, which discusses some pros and cons of cloud-based ML training, the example application we’ll develop, and how to find and upload data for training. Part two focuses on training, result interpretation, and model testing.
Some Classical Hurdles of Offline ML Model Building
But before we get started, let’s briefly recap the classical issues that raise the barrier of entry to offline machine learning!
- Data Management
Machine learning requires lots of data for training and verifying a model, meaning the data must be stored somewhere. Data storage can become problematic when dealing with time-series data, like video or audio samples, or when working on a more limited platform, such as the Raspberry Pi. - Metadata Management and Preprocessing
When using data from multiple sources, the samples may not be annotated at all, or each bundle might use different annotation and metadata formats. Therefore, data must be normalized and preprocessed before it can be used for training, which can be an error-prone and challenging task, especially without experience. - Algorithm Selection & Mathematical Fundaments
- Understanding the Framework, SDK, and Programming Language
- Managing Python Installation and Libraries
While this task has also become increasingly easy in recent years, it still requires knowledge of creating and managing virtual environments and packages — not easy for someone who just wants to get started quickly without prior experience! - Computational Resources
- Graphing and Interpretation of Results
Creating understandable plots and graphs that help debug problems during model training is often a task that developers must implement themselves, even when using ML frameworks. They must understand the outputs and how to make sense of them. Developers must also know how to transform the data before feeding it into another library that creates the plots. Finally, interpreting the created graphs is also not a trivial task.
Downsides of Using Cloud-Based Services for ML Training
As with everything in life, there’s usually no free lunch, and cloud-based ML training also has some downsides that users should be aware of. For me, the three most prominent ones are:
- Privacy Concerns
When using a cloud service, you trust them with your data, which may contain sensitive information. Now, granted, these services have TOUs that you must carefully review before using them, and you should never upload data you care about to a site you don’t trust. But even if the service is trustworthy and their privacy policy aligns well with your goals, some applications may still prohibit using cloud-based services. You should always be extra careful when handling sensitive personal data, such as medical records and financial information, especially when the information is not anonymized or pseudonymized. Further, you must be aware that some of these services may use the data to train their own models, especially when they’re free. - Reduced Flexibility Compared to Local Training
With cloud-based services, you only offer so many algorithms and preprocessing methods. Usually, the options cover a broad basis of common use cases. However, you may need to return to a good old manual implementation to perform more unique or exotic tasks. - The Free-Tier Is Often Limited, and Paid Options Can Be Expensive
Let’s Start With The Task Description
Alright, now that we’ve got the basics covered, let’s look at what our trained model should do in the end! :)
We’ll implement a classical hello world type of example in ML, namely a model that can categorize a static input image into one of two categories: CAT or DOG. Effectively, the finished model predicts whether an input image contains a dog or a cat. If neither is present, it’ll just choose the class with the highest likelihood.
From this simple description, we can already extract vital information about what kind of model we need to build and what data we need. We’re dealing with a binary classification task, meaning the model splits any input into one of two (binary) categories and outputs the predicted labels (classification) with their corresponding probabilities. We perform supervised learning, meaning we know the target labels of all training, validation, and test images. For that, we must find or create a data set of labeled images (i.e., someone must look at all the photos and write down whether they contain a cat or dog).
Finding a Suitable Dataset
There are numerous ways to build a data set for ML model training. In reality, you usually already have the data or know how to get it. For example, you may have an extensive table of blood glucose measurements and the diabetic status of patients, and you would like to train a model to predict how likely a new patient is either HEALTHY, PREDIABETIC, or DIABETIC based on their measurements.
But if you don’t have the data, you can still create it yourself (which is time-consuming!) or find it online on websites like Kaggle, which is the approach I’ve chosen.
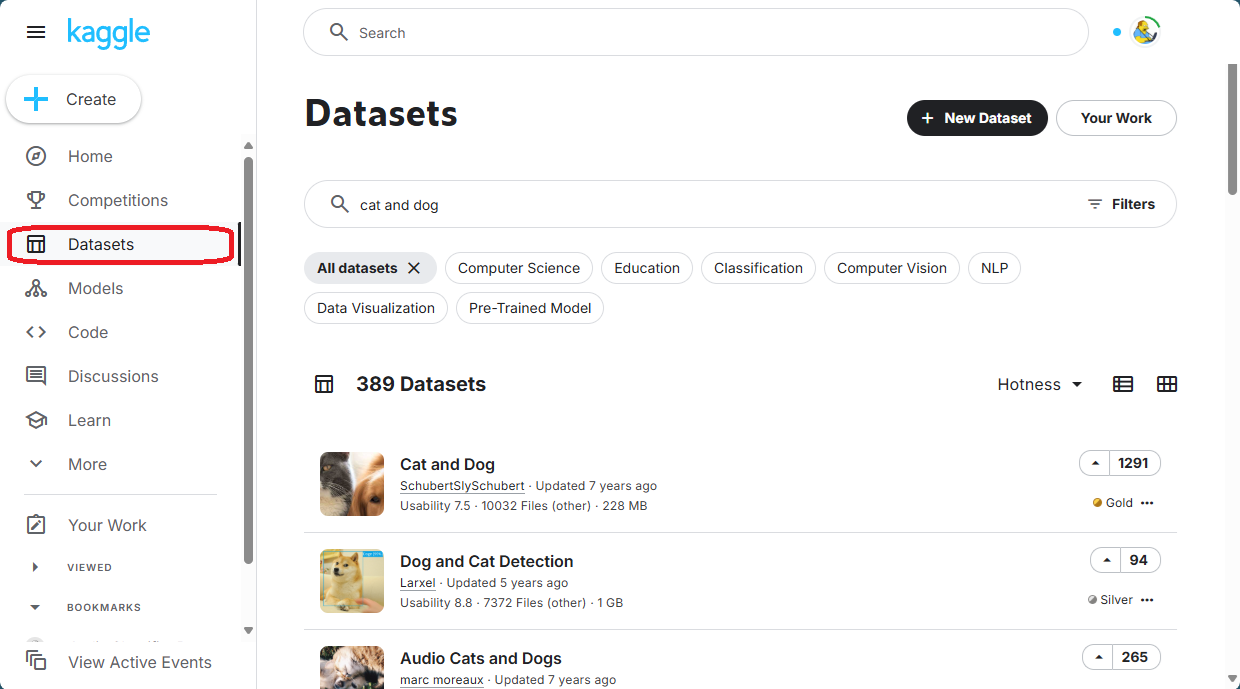
To proceed, click the “Datasets” tab in the Kaggle sidebar and enter your search term:
Once you find a data set you like, you can download it as a ZIP archive:
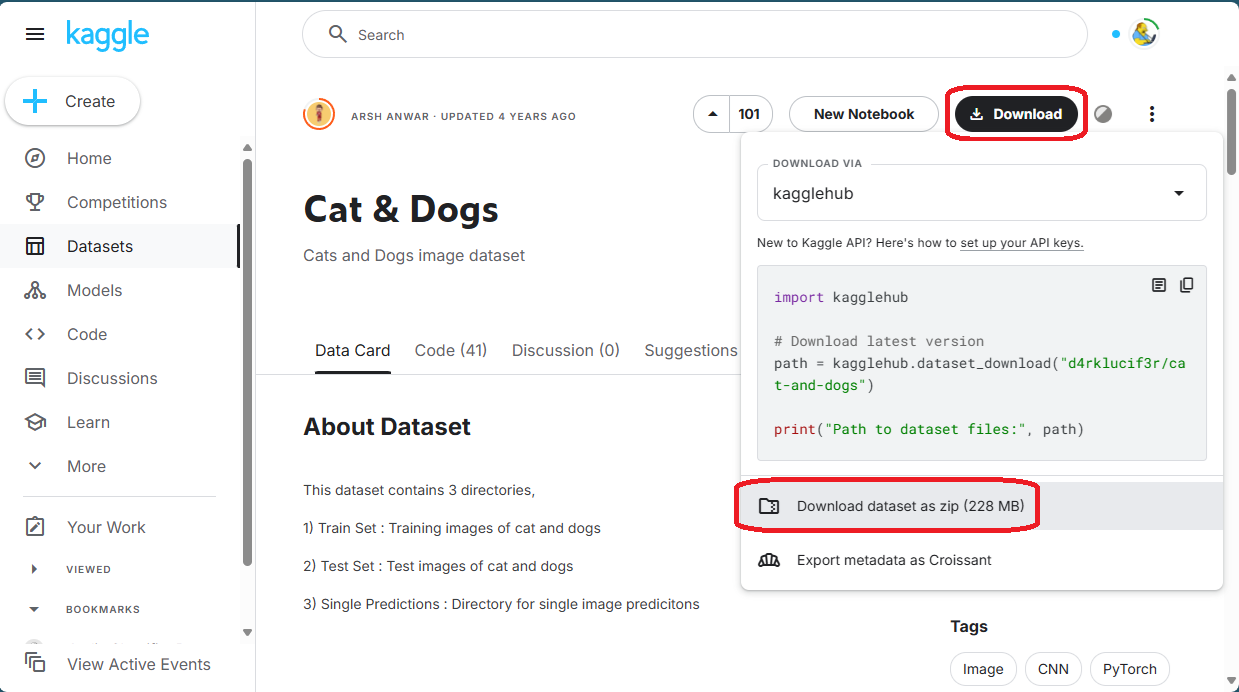
I’ll use this data set provided by user Arsh Anwar as it contains many images (ten thousand), and the ZIP archive is not too large.
Verifying the Downloaded Data
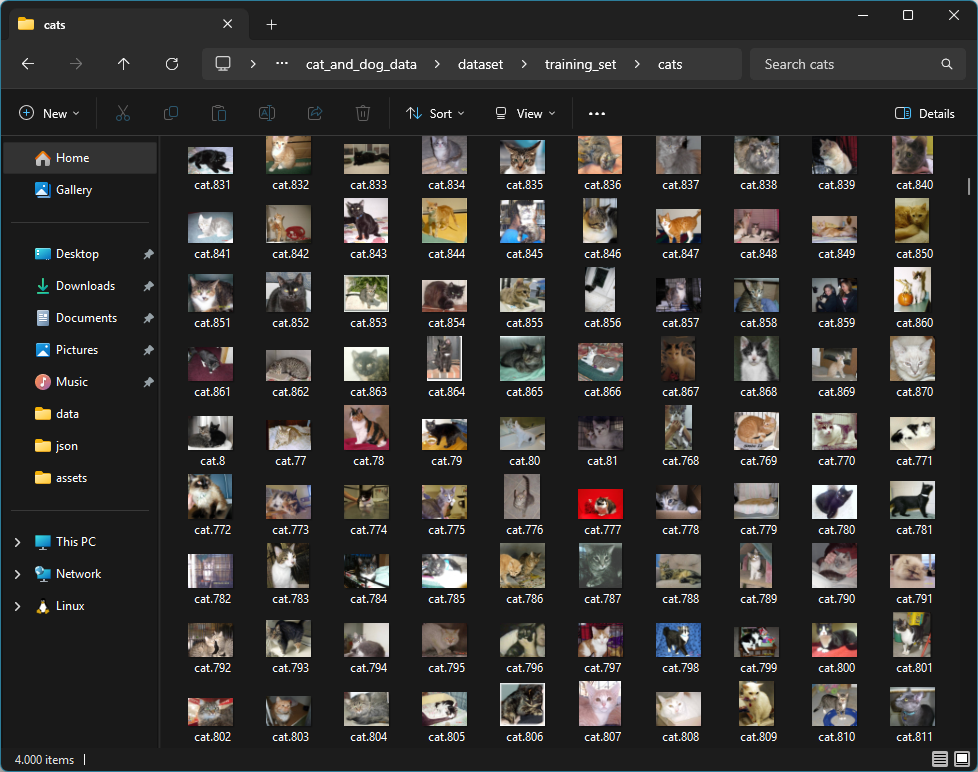
Before proceeding with ML training, it is always a good idea to get an overview of the data used to train the model. This step is even more critical when relying on automatically captured information (e.g., from sensors) or data from external sources like Kaggle. This step ensures that the model doesn’t learn incorrect patterns in garbage or noisy data, which can quickly happen since an ML model will always learn from the data, even if it’s useless. However, the predictions will be incorrect or unreliable when based on tainted inputs. In this instance, just open the downloaded ZIP archive and look at the images to verify that they depict the correct animal based on their categorization:
Note that you don’t have to look at every image in the set, and even a few incorrectly labeled ones won’t spoil the soup when you have a sufficiently large sample. Just ensure that the overwhelming majority of data is not garbage or mislabeled.
Repeat the check for every label you want to teach your model and for the validation and test data if they exist. Finally, you should always perform this basic sanity check, regardless of the type of information you’re dealing with or the source.
Transferring the Data to Edge Impulse
After all the preparations are done, it’s finally time to transfer the data to Edge Impulse for training. To get started, create a free-tier account on Edge Impulse. This tier should suffice for hobbyists, students, and private individuals who are into quick prototyping. The main limitations of this tier include only permitting two private projects, a maximum job time of 20 minutes, and a maximum of 4 GB of data (or four hours of time-series data).
Click the “Data Acquisition” option in the left-hand side toolbar:
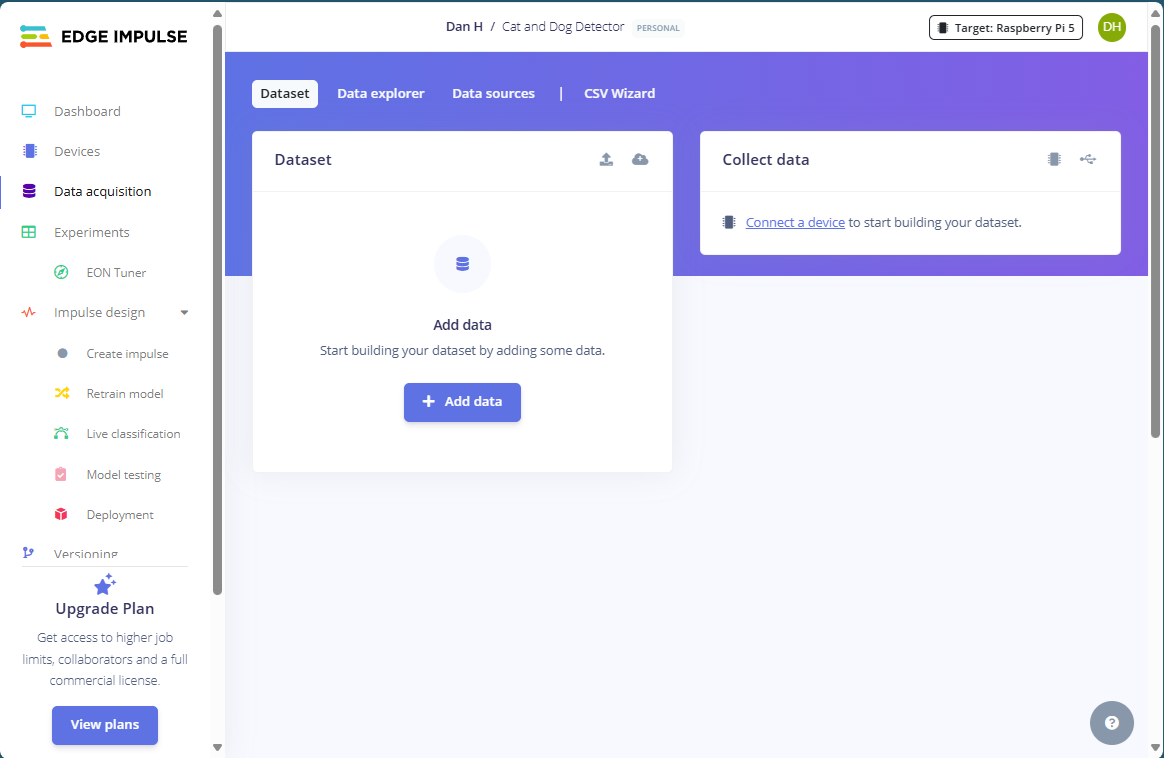
Then, select “Add Data” followed by “Upload Data” to reveal the upload dialog. Set the upload options to “Select a Folder,” select the cat-folder from the training set, and enter “CAT” for the label:
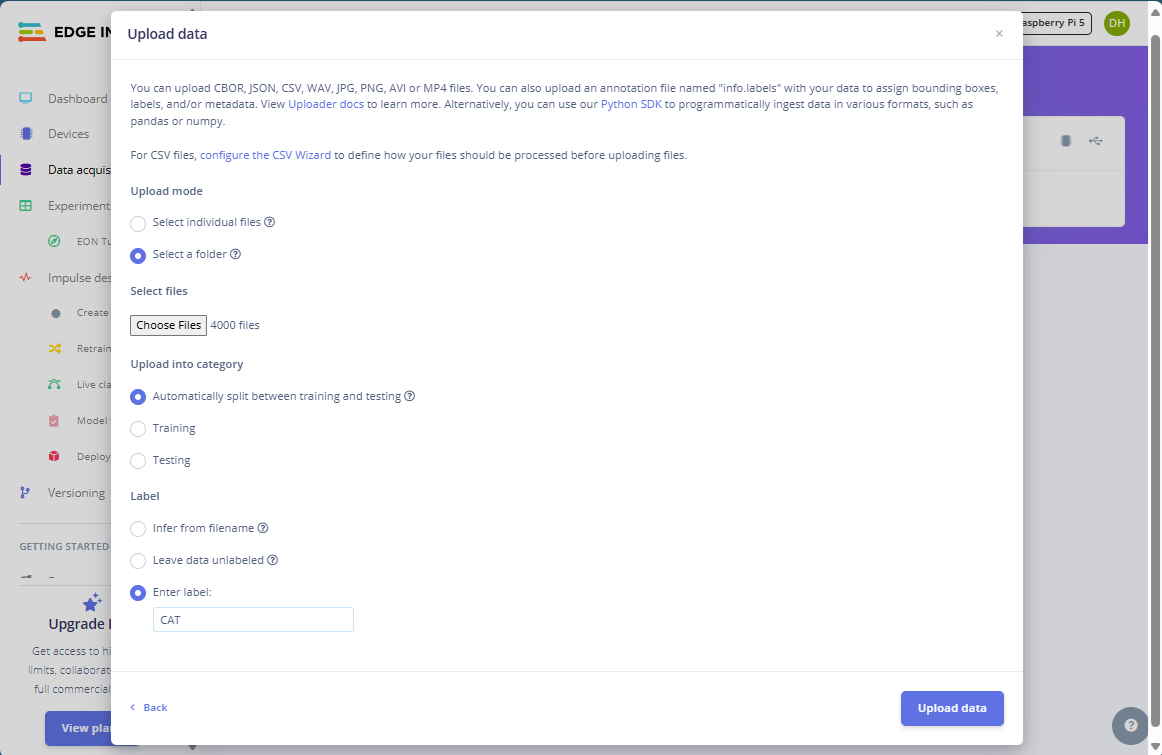
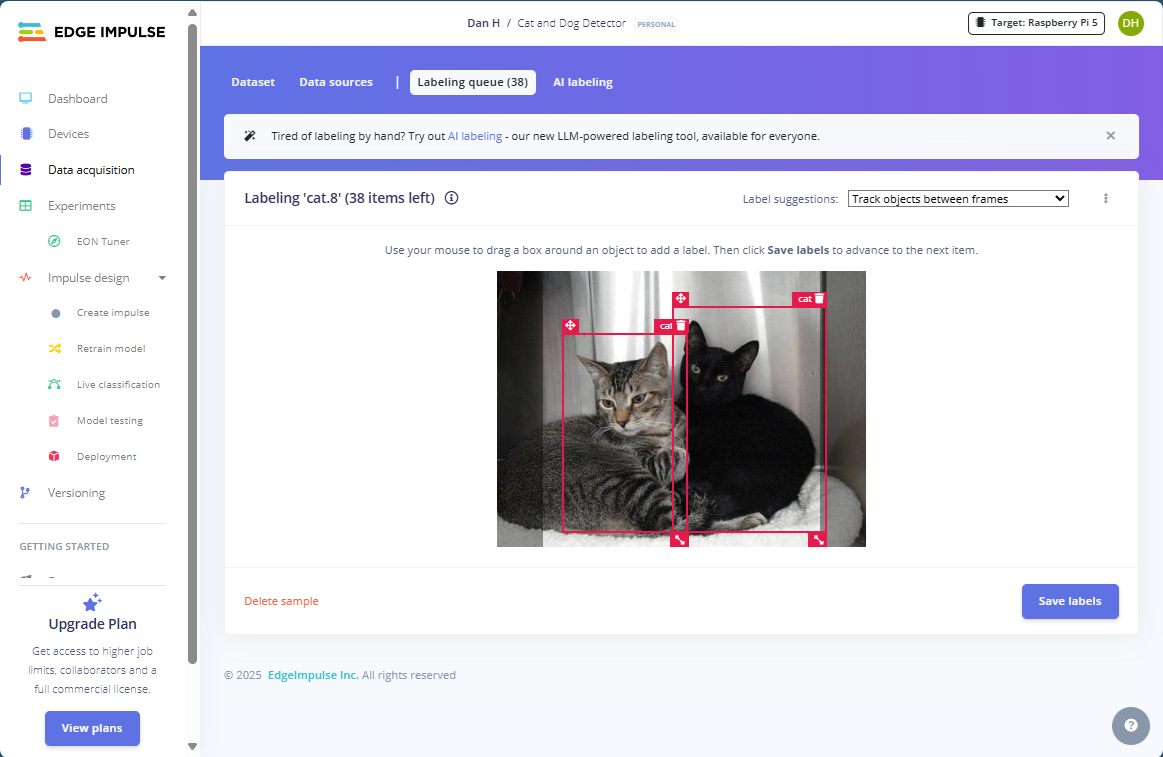
Important! Do NOT switch the labeling mode to “bounding box” when asked by the uploader. Remember that we want to perform binary classification of an entire image based only on a single label. So, the model only tells us whether it thinks a dog or cat is in an image. In contrast, the bounding box mode would mean that the finished model can identify multiple objects and their locations in an image, which is also cool but not what we want to do in this case!
Note that I let the uploader automatically split the data into training and test sets using an 80-20 split. The author of this data set provided images for each subset, so you could’ve also uploaded the dedicated images separately. But I chose to do it this way because I figured 4000 samples should be enough for this simple application, even when split in an 80-20 way, and I didn’t have to wait for too long this way. However, we might look into how changing the setting might affect the model’s performance in part two of this series!
Either way, wait for the upload to finish, and then repeat the same steps for the dog training samples.
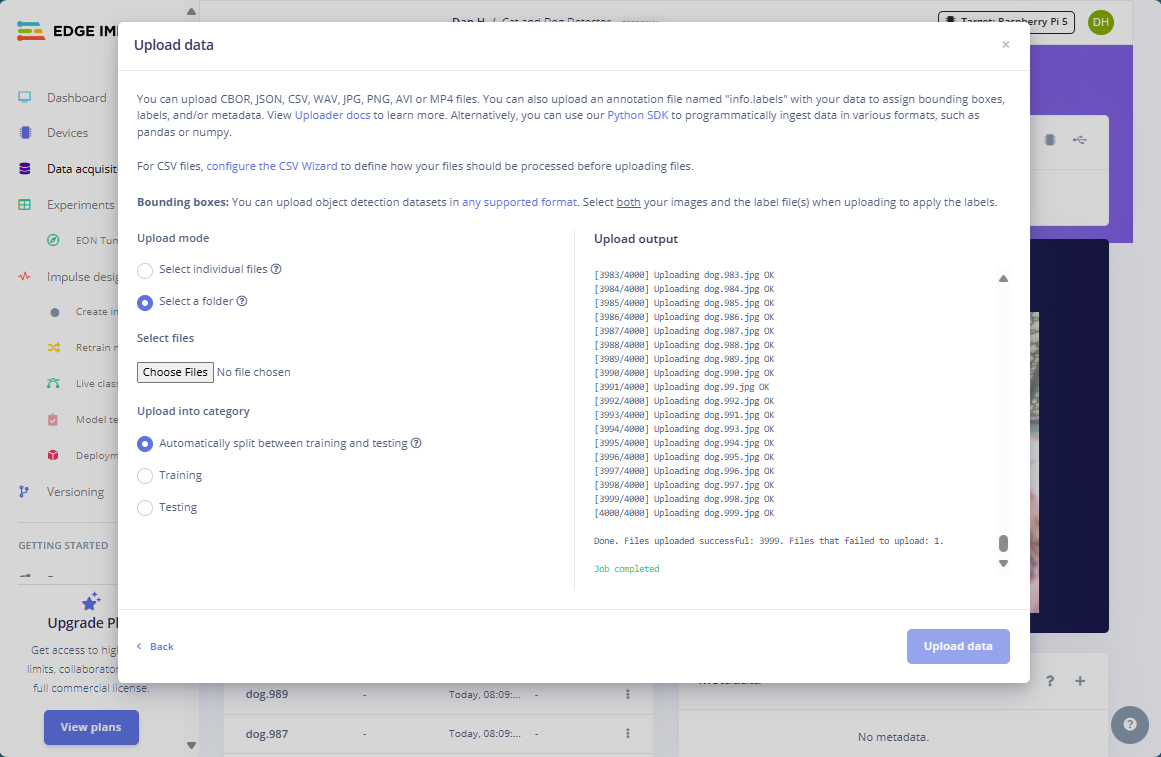
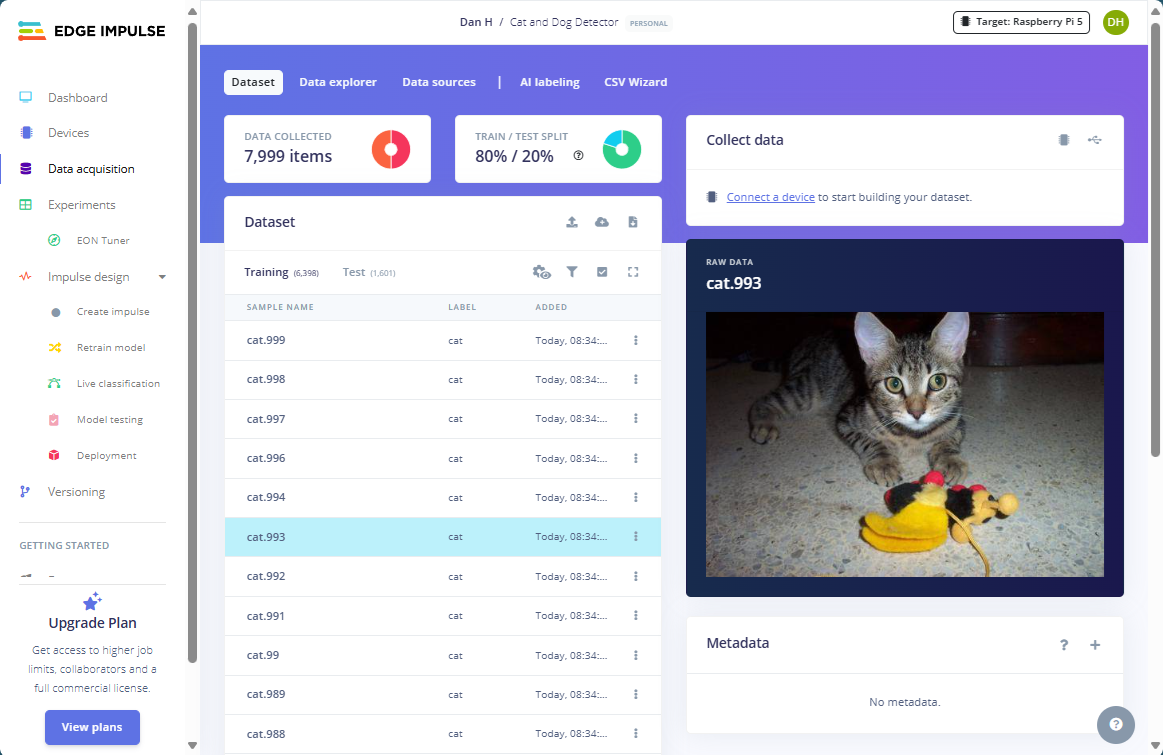
It’s OK if some uploads fail due to transmission errors or incorrect image metadata as long as most of the file uploads succeed. Your data acquisition panel should now look similar to this:
Next Steps
This is the perfect time to conclude the first part of this mini-series! Let’s recap what we’ve learned so far:
- Cloud-based machine learning is easy to pick up and perfect for fast prototyping. It doesn’t require extensive knowledge of algorithms, programming, or the underlying mathematics. However, some users may have data security and privacy concerns. Further, paid services can quickly become costly, but they usually offer a limited free tier for students and hobbyists.
- Data acquisition and sanitization are key. Get your data from reliable sources or use your own data if possible. Make sure it’s labeled and verify label accuracy unless you want to painstakingly go through thousands of samples and label them manually.
- Uploading the image samples to Edge Impulse is easy. For simple classification tasks, do not choose the bounding-box detection mode. Instead, assign each image with precisely one label.
In the next part of this series, we will examine how to transform the images to a format the computer can process and how to use the transformed data to train a machine-learning model.
Table of Contents
Part 1 - AI Made Accessible: Model Training for Beginners with Edge Impulse (You are here)
Part 2 - Build a Professional Machine-Learning Model in Minutes Without Programming (Not released yet)